Tuesday, May 20, 2014
Eral Kathirikkai Murungakkai Kuzhambu Prawns with Brinjal and Drumstick

Since cleaning prawns is a tough job, I always buy prawns from the lady who brings on her head home. I buy from her for the past 20 years. She as a practice cleans the prawns and takes out the kudal i.e., a long black thread like thing from its stomach. If that is not taken out it will lead to stomach pain. After she cleans and goes, I will make sure that she has taken it out from all the prawns. This Sunday as it is holiday time the town looks deserted as many have gone to their native place and she could not sell her prawns fully. She compelled me to buy more and was telling different recipes. I always make the prawn curry which my younger one loves. So I have never thought about an alternate recipe and that too kuzhambu. She said make vadai adding surakkai. I said I don’t use surakkai. Then she said radish and a handful of prawns will make yummy gravy. The smell of radish also will make my younger one run away from the dining table. So I thought I will make kuzhambu using one brinjal and one drumstick with little small onions and garlic. She said that also will be good and managed to sell ½ kg more of prawns.
The taste of the kuzhambu has no words to describe. My husband who always tries to make fun of my cooking somehow couldn’t resist telling that the dish is one of the best that I have cooked. My younger one who is very choosy also fell for its taste and said if I write a blog on this she will be the first to write the comment as she has tasted it. There was not a drop of gravy left over after dinner.
Those who live abroad may find it difficult to get fresh drumstick. They can try with radish or brinjal alone. A handful of prawns are enough. 100 to 200 Gms of cleaned prawns will be enough.
Ingredients

Prawns-100 Gms (cleaned) more can be added if desired
Brinjal-1
Drumstick-1
Small onion-20
Tomato-1
Garlic-20 pods
Curry leaves-little
Sambar powder-2 teaspoons
Coriander powder-2 teaspoons
Turmeric powder-1/2 teaspoon
Tamarind-gooseberry size
Procedure
In a kadai in 2 teaspoons of gingerly oil or cooking oil season the gravy with a teaspoon of mustard seed and little vendayam and curry leaf. Sauté the chopped onions nicely then the garlic and finally the tomatoes. When they are sautéed well add the sambar powder, coriander powder and turmeric powder and sauté well. Now add the brinjals and sauté in medium fire for 5 minutes. Meanwhile in 2 cups of water mix the tamarind and the salt needed .Once the brinjals are sautéed well add the tamarind salt water. Reduce the flame once the gravy starts boiling. Add the drum stick also. Cook for 10 minutes in low fire. Make sure that the brinjals doesn’t get overcooked. If so reduce the cooking time. Now add the prawns and cook for 5 more minutes. Prawns do not need much time to cook. Let the gravy stay for at least 2 hours before serving for best taste.
The gravy should not be very watery. It should be like puli kuzhambu.

Sunday, May 18, 2014
Spinach Soya beans and Yellow peas curry Healthy Recipe


Yellow Peas (Dry)-1/2 cup
Spinach washed and chopped-3cups
onion-1/2cup chopped
Ginger-1 inch
Garlic-2 cloves
Tamarind concentrate (Juice)-4tbsp
Garam masala-1/2tbsp
Coriander powder-1tbsp
Green chili-2
Red chili powder-1/2tbsp
Salt to taste
Mustard seeds-1/2tbsp
Cumin seeds-1/2tbsp
Red chili-1
Curry leaf- 1 spring(Optional)
turmeric-1/4tbsp
oil-2tbsp
Method:
Soak Soybeans and yellow peas together for 6hrs and pressure cook them for 2 whistles. Drain water and keep aside. Do not throw the drained water.

Heat oil in a pan and add cumin seeds and mustard seeds when they splatter add red chili and saute. Add onion, turmeric,green chili, curry leaf and cook till it is tender, meanwhile grind garlic, ginger and green chili together and add this mixture to onion. Close the pan with the lid, cook till the oil leaves the curry from sides. The add spinach and cook till it is well done. Mash cooked soy beans and yellow peas coarsely and add it to the spinach, also add 1/2 cup water (that is drained from beans) and mix well.

Finally add red chili powder, tamarind extract, coriander powder and salt to taste and mix well. Check for taste and cook till the raw flavor from spinach goes away. Turn off the stove.
Enjoy this curry with roti/naan/rice. Hope you like my recipe.
Wednesday, May 14, 2014
ONION AND CRANBERRY CHUTNEY


This chutney is the same as the onion and tomato chutney I make regularly, only this time I substituted the tomatoes with cranberries. This chutney was a little sour, so I added some jaggery to balance the taste. It tasted so good with idlis and dosas. I even paired this chutney with wheat rava idlis next day and it tasted good with those idlis too. The jaggery can be replaced with brown sugar, regular granulated sugar, or any artificial sweeteners.
INGREDIENTS:
Red onions, medium-sized, 2.
Cranberries, fresh or frozen, 1 cup.
Garlic, 2-3 cloves.
Red chilies, 3-4.
Asafetida, a pinch.
Jaggery or brown sugar, 1 teaspoon.
Salt as per taste.
Mustard seeds, 1 teaspoon.
Preparation:
Dice the onion into big chunks and keep aside. Heat a pan with some oil. When the oil is hot enough, ad the onions and sauté them for a few minutes until they turn brown, then add the garlic cloves, red chilies, asafetida, and cranberries and sauté everything for a few more minutes until the cranberries start to burst. Let it cool and grind everything into a smooth paste and add some salt and jaggery as per taste. Heat another small pan with some oil and when the turns is hot, add the mustard seeds and let it splutter. Pour this mixture over the chutney and mix well. Serve with idlis, dosas, and chapathis.
If needed, the chutney can be diluted with a little water and cooked under low flame for a few more minutes to get the desired consistency.

I made whole wheat pizza from scratch this weekend. I made the crust with whole wheat flour, 1 teaspoon of wheat germ, and ground flaxseeds. The crust tasted more or less similar to that of a regular pizza. The only topping I used here were some skim milk mozzarella cheese and caramelized onions. I cut the onions into long thin strips and sautéed them until they were brown and added it as the toppings. If you are crazy about onions like my hubby and I, you are sure to love this pizza :)
Thursday, May 8, 2014
Coconut cream and Self rising flour Cake

Here is the recipe,
Ingredients:
self rising all purpose flour: 3 cups
salt-1/2 tea spoon
sugar-one and half cup
coconut cream (sweetened) ----1cup
vanilla essence-2ts
Eggs-3
Milk enough for mixing dough
Butter- 1/2 cup ( I used Olive oil-1/4cup)
Nuts and resins-optional
Method:
- This mixture will perfectly bake in 9" baking tray.
- Take a baking tray and grease it with oil and dust with flour.
- Now take sugar, salt and flour in a separate bowl and mix them.
- In another bowl brake open eggs and beat them while adding milk and vanilla essence.
- Heat the Coconut cream and butter until it becomes liquid under medium flame/ microwave for 30 sec.
- Wait until the cream cools down.
- Now mix the cream mixture with milk& egg mixture and pour it on to the flour & sugar mixture.
- Keep stirring the mixture until you wont find any lumps.
- Mean while pre heat the oven at 350F.
- Pour the cake mixture on to the baking tray, decorate with nuts & resins(optional) and bake for 15-20 min.
- Check the cake by inserting a knife into it, if the knife comes out clean then you have baked for perfection, else continue baking for few more minutes.
- When the baking is done, remove the tray from oven and let it cool to room temperature and turn upside down to get the cake out of the baking tray.
- Enjoy this fluffy sponge like cake as a perfect tea time snack.

Tuesday, May 6, 2014
Grilled Lemon Chicken and Crazy Brown Rice

If youre looking for something quick, easy and tasty for a weeknight meal look no further. Serve with a salad and you have a very tasty, healthy meal. Chicken cutlets cook up very quickly but you could also use chicken breasts and they will cook up pretty fast as well. My chicken cutlets were pretty small so I didnt need to use a lot of liquid. If you use breasts you may want to increase the amount of lemon juice.
Crazy Brown Rice...weird name, isnt it? Thats the nice version of what Steve suggested I call it. Oh, he liked it, dont worry he just felt like busting my chops! The brown rice is something new that I bought from Trader Joes. The rice comes in a box with three packages of two servings each. There are two ways to cook it, microwaved in the bag it comes in (like those veggies in a steamer bag)or in a pot on the stove top. I cooked it on the stove for about 10 minutes. If you have another brand of brown rice feel free to use it. You can use white rice as well. I was trying to be healthy and get Steve to try something new.
So here you have it. Grilled Lemon Chicken with Crazy Brown Rice. Delicious!
Grilled Lemon Chicken
Ingredients:
1 package thin sliced chicken cutlets
1 lemon, zested and juiced
1 tsp minced garlic
1/4 cup fresh parsley, chopped
2 tbsp olive oil
1 tsp Italian seasoning
1 tsp Mrs. Dash Table Blend
salt and pepper, to taste
Directions:
Combine, lemon juice and zest, garlic, parsley, olive oil, Italian Seasoning, salt and pepper in a bowl, add chicken and allow each piece to get coated with mixture. Let chicken marinate for one hour.
Heat grill pan and drizzle with a little oil or cooking spray. Cook chicken on both sides until browned and cooked through.
Crazy Brown Rice
Ingredients:
1 package of Trader Joes frozen brown rice (2 serving package)
1 small onion, chopped
2 cloves garlic, minced
1/2 zucchini or 1 small baby zucchini
2 campari tomatoes, chopped
approx. 1/4 cup diced red bell pepper
a splash of dry white wine
extra virgin olive oil
salt and pepper, to taste
1/4 cup parsely, chopped
Directions:
Cook Rice according to package directions. While rice is cooking saute onions and garlic in oil. Add
Meanwhile, saute onions, peppers and garlic in olive oil. Once softened add zucchini and let cook for about 5 minutes. Add tomatoes and let them cook down, about 3-4 minutes, add wine and reduce, season with salt, pepper and parsley. Add cooked brown rice and toss with veggie mixture. Add more oil if it seems dry. I cant believe I forgot to take a picture of the rice before I arranged it on the plate. I really thought I did but the picture is nowhere to be found so I guess I didnt. Sorry!


Monday, May 5, 2014
Mango and pineapple smoothie

Ingredients
- Mango puree 1 cup
- Coconut milk powder 2 tbsp
- Lemon juice 1 tbsp
- Pineapple juice 1 cup
- Sugar 2 tbsp
- Ice cubes 1 cup
- Yogurt ½ cup
- Desiccated coconut 1 tbsp
- Pineapple or coconut essence few drops
- Blend altogether and serve immediately.
Saturday, May 3, 2014
Coffee made simple with Oxo Good Grips and Douwe Egberts

We love our coffee although we tend to go for tea first thing and start on the coffee for elevenses and then again after dinner in the evening.
A recent survey by OXO shows that 6 in 10 of us prefer instant to ground coffee because of the hassle ground coffee poses, not just in preparation but in cleaning up afterwards too. That was until OXO took away all the hassle with their new French Press.
The French Press (£35) is a modern twist on the traditional cafetiere. Housed in a sturdy stainless steel and glass carafe, the innovative ladle ‘the groundskeeper’ catches and contains ground coffee in a jiffy, removing the used grounds in one simple step.
For optimum brewing and the perfect cup every time, simply add hot water to your ground coffee using the measurement markings for guidance; stir, steep, plunge and pour. It can serve up to 8 cups, so when your friend pops round for a coffee, no need to re-brew.
To clean forget banging, scooping or scrubbing; simply lift the groundskeeper out of its carafe, wash and drip dry.
I was fortunate to be able to test-drive the Oxo Good Grips French Press along with a selection of Douwe Egberts coffee.

House Blend: for those who want a delicious ground that tastes perfect every day this smooth, full bodied European-style coffee is prepared with a classic blend of the finest beans. (Strength 3)
Café Milano: when only a traditional Italian-style coffee will do, this smooth, laid-back blend with a hint of spice evokes the flavours of Milan and is perfect to relax and escape with. (Strength 3)
Fired Up: for those who love to savour a rich, intense coffee this powerful, espresso-style blend is created with dark-roasted beans to bring out the delicious, intense flavours of spice and chocolate. (Strength 6)
We found the Fired Up coffee a bit too bitter and strong for us, so we made our own blend, mixing it with the House Blend worked rather well for us.
Douwe Egberts have put together 10 top tips for making great coffee in the French Press and Ive added my comments!
Warm your OXO French Press: You wouldn’t put hot food on a cold plate, so dont put hot coffee in a cold French Press. Pre-heating your French Press with boiling water keeps your coffee hotter for longer and improves the flavour. A cold French Press will add bitter flavours to your coffee. This is definitely a good tip, we still found that the coffee cooled more than in our filter coffee maker which has a heating element in the base.
•Let your coffee bloom’: When you add your coffee to the French Press, add only a little hot water first, just to cover the coffee, then stir before adding the rest. This allows the coffee to bloom releasing all the trapped aromas. No strong feelings about this.
•Stir in a cross pattern: When stirring your French Press, stir in a cross pattern rather than round and round. This ensures all the coffee grounds are agitated and gain maximum exposure to the water. Again, I couldnt really taste any difference.
•Never use boiling water to make coffee: This burns the coffee grounds and gives the coffee a sour, burnt taste. Once the kettle has boiled, leave it for one minute, which should allow it to cool to an optimum brewing temperature of approximately 90/95 degrees. We NEVER do use boiling water whether its ground coffee or instant coffee.
•Add lemon or salt: If you drink your coffee black, adding a slice of lemon to the French Press with a lightly roasted coffee will bring out the citrus notes in the coffee. Similarly, adding a pinch of salt to a French Press of dark roasted coffee will highlight the dark caramel and nutty flavours. Still to try this sounds intriguing.
•Wait! Once youve filled and stirred your French Press, leave it to brew for at least three minutes. After that, break the crust to let most of the grounds sink, scoop any remaining grounds off the top, put on the lid, plunge and enjoy! Absolutely!
•Use the groundskeeper from your OXO French Press: Once youve finished your coffee, you can remove the grounds with no mess using the OXO groundskeeper, and re-use them for all sorts. Coffee grounds make great fertiliser and if youre feeling brave, can even be added to shower gel as an exfoliant! Mine goes into the compost!
•Keep your French Press clean: Coffee is full of oils, which is why it has such a special aroma, but the oils also get everywhere, so make sure you clean your French Press after every brew otherwise the oils left behind can go stale and taint your next coffee. This is a good tip, but it would have been better if the French Press was dishwasher safe.
•Don’t wait! After your first cup, dont leave your French Press for too long before drinking the rest of your coffee. Coffee (like all hot drinks) will go stale if left brewed for too long. Any more than an hour and youd be better off brewing fresh, to get the best cup! This is a top tip, it will cool quickly as well as becoming slightly bitter and stewed.
•Take the plunge: When you plunge, make sure you plunge straight down and not at an angle otherwise you will end up with coffee grounds in your coffee cup. We still found a few coffee grounds, although cleaning the French Press was much easier than with other cafetieres.

OXO UK have a French Coffee Press up for grabs on their Facebook Page it runs until this Thursday, 21st March 2013.
Friday, May 2, 2014
Walkers Hoops and Crosses a sponsored post


- Each bag has 85 calories
- Hoops and Crosses are made from wholegrains, have no artificial colours or preservatives
- They come in three flavours – all suitable for vegetarians (prawn cocktail, roast beef, salt and vinegar) thats quite a trick making meat flavours for vegetarians!


I was paid by Walkers for this post, but was not required to give a positive review and my opinions are my own.
Friday, April 25, 2014
SANDRA’S RADIANT KIELBASA and BROCCOLI FRIED RICE
 |
| A complete, radiant, and delicious meal you can quickly prepare with leftover rice... |

Thursday, April 24, 2014
How and Why to Use a Knife Steel – Our Most Cutting Edge Video Ever
 I dont think there have been any official government studies regarding the use of knife steels, which is a good thing since that would have been a really silly use of taxpayer money (unlike investigating the sexual arousal in anesthetized female rats…true story).
However, if such a study was done, I believe wed learn that most home cooks have no real idea what this very important tool is for. Many think its a knife sharpener, and when their knives get dull, they pull it out, only to be sorely disappointed that "it doesnt work."
A knife steel is made to keep a sharp knife, sharp, and will do so for quite a while if used properly. By the way, most cuts in a kitchen are due to dull knives, so this video may save you a visit to the ER. If you don’t have a steel, go buy one, theyre only about $20, and worth every penny!
If your knives are dull, please take them to professional knife sharpener (every city has one), and for a few dollars per knife you can have the edge put back on them. Then, using the simple technique youll see in this video, youll keep that sharp edge for a very long time. One thing I failed to mention in the clip, wipe the knife after using the steel – there will be a small amount of superfine metal dust produced. Enjoy!
Déjà vu
No, you’re no going crazy, I have done this lesson before, but it was for About.com, and Ive wanted to do a Food Wishes version for a long time. Im glad we straightened that out [rim shot].
Saturday, April 19, 2014
Champagne Wishes and Caviar Nails


Anyone else tried out the caviar manicure? What do you think??
Wednesday, April 16, 2014
SANDRAS SUPERBLY MOIST BANANA NUT and RAISIN BREAD
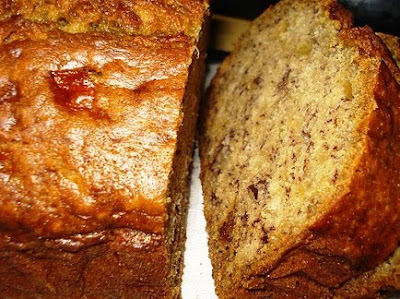 |
| Over the years Ive made many, many variations and this is my absolute favorite to date... |
Prep: 10 mins. |
Bake: 1 hr.
Posted by Sandra
INGREDIENTS
2 cups all-purpose flour
1/2 teaspoon baking soda
1 teaspoon double-acting baking powder
1 cup white sugar
1/2 cup brown sugar
1/2 teaspoon salt
2 eggs
1 teaspoon freshly grated orange zest
1/2 cup butter (1 stick), at room temperature
2 cups “ripe” bananas, cut into very small chunks (about 3 large)
1 teaspoon vanilla
2 teaspoons cinnamon
½ teaspoon nutmeg
3/4 cup of milk
1 cup combination of cup chopped pecans, and raisins
--(or craisins, or other dried fruit, or brand of nuts, also see “Tip”)
--Cinnamon/sugar for sprinkling on top
METHOD
Preheat oven to 350 degrees. Prepare a loaf pan sprayed with baking flavored oil.
Sift together the flour, baking soda, baking powder, and salt into large bowl.
In a medium bowl, cream together the sugar and butter. Beat the eggs slightly in another medium bowl, and add to the creamed mixture, mixing to combine. In the same medium bowl, add the chopped bananas, and then add to the creamed mixture. Add the vanilla, cinnamon, nutmeg, and orange zest and beat, just until combined.
Mix in the sifted dry ingredients until combined, then stir in milk and nuts (or your preferred additions, but do not exceed ½ cup total).
Place the mixture into the prepared loaf pan, and bake for 30 minutes, remove and sprinkle with top with cinnamon/sugar, and continue baking for 30 more minutes, until the top is brown and a toothpick inserted in center comes out clean.
Remove from oven and place loaf pan on its side for 10 minutes, and then place on a cooling rack and cover loaf with a clean kitchen towel to cool for 10 minutes before spreading slices with butter or cream cheese, and a hot cup of coffee or tea, or a cold glass of milk. – Enjoy!
~~~~~~~~~~~~~~~~~~~~
Tip: If you use frozen cranberries or blueberries, once thawed if there are any juices present be sure to drain first through a colander or sieve, although maintain the 1-cup quantity.
Sunday, April 13, 2014
Creamed Peas and Southern Style Green Beans
 As you already know I made Southern themed dinner for my group The Dinner Divas on Saturday. I wanted to go traditional with the sides without it being too heavy and hopefully I achieved that. I really liked the peas more than the green beans. The peas are basically cooked in a bechamel sauce which is very tasty. Thank you to my friend Carolyn from bakespace for helping out with this recipe!
.JPG) My issue with the beans are that they are sweet and sour. I like sweet and sour meatballs but not my veggies. I should have remembered that I made spinach this way once before. It just didnt appeal to me but the girls liked it...well, at least they said they did!
My issue with the beans are that they are sweet and sour. I like sweet and sour meatballs but not my veggies. I should have remembered that I made spinach this way once before. It just didnt appeal to me but the girls liked it...well, at least they said they did!Southern Style Green Beans
Courtesy of Rachael Ray
4 servings
Ingredients:
1 1/4 pounds green beans, trimmed and chopped into 1-inch pieces
2 slices bacon, chopped
1 small onion, minced
2 tablespoons red wine vinegar
2 teaspoons sugar
Directions:
Cook green beans in 1-inch simmering water, covered, for 6 minutes. Drain and set aside. Return skillet to stove and set burner to medium high. Add bacon and brown. When fat begins to render, add chopped onions to the pan and cook until tender with the bacon. Add cooked green beans to the pan and turn to coat in bacon drippings and onions. When the beans are hot and bacon crisp at edges and onions translucent add vinegar to the pan and season with beans with sugar. Allow the vinegar to evaporate and the sugar to combine with pan drippings, 1 to 2 minutes, then serve.
Creamed Peas
Courtesy of Carolyn - posted on bakespace.com
Ingredients:
2 Tablespoons butter
2 Tablespoons flour
1/2 tsp. salt
1 cup milk*
about 2 cups fresh or frozen peas
DIRECTIONS:
Melt butter in saucepan. Add flour and salt, stir well until combined add milk and bring to a boil. Stir until slightly thickened. Stir in cooked peas. Serve over mashed potatoes if you wish.
*Micheles Note - If the roux becomes too thick when you add in the peas just add a little more milk and it will thicken up again.
